Then, this weekend, I ripped out the ceiling in the shower in the master bath. The bare bulb attached to it in a lovely porcelain fixture was, unfortunately, another code violation that the city said we had to deal with, in favor of a recessed fixture. The ceiling was made from the same fiberboard as the wall on the basement stairs, covered with a thick layer of plaster. It seems that this material was used throughout the house.
While this fiberboard and plaster combination may not be as durable as lath and plaster, it seems to have been good enough, surviving for 80 years in one of the more difficult environments for plaster, the shower stall.
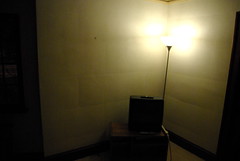
It seems, if you look at the above photograph, that these fiberboard panels were only nailed at the edges. I'm seriously considering the use of a countersink bit and some drywall screws to help even out the panels and make for a smoother wall.
Has anyone ever encountered these walls or know of anyone who has dealt with them? Is there some basic reason why drywall screws shouldn't work to hold them in place? Is there anything else I should know?

4 comments:
I haven't dealt with those types of walls, but fiberboard panels explains the eerily regular pattern of bowing!
Beyond regular drywall screws, you may want to consider the screws meant to go through "Durock" (which is the cement board that goes into modern showers). They're a bit sturdier, and have a stronger pulling ability, as they're meant to go through a heavy-duty material.
You probably don't have to use a countersink bit, either. The standard recommendation when hanging (modern) drywall is that you want the screw to dimple the paper, but not break it (has to do with the holding strength). I'd suspect you'd want to treat this the same way.
Then a quick skim-coat to cover the screw dimples and maybe even out any remaining joints, et voila!
That all sounds good. I should note that this is relatively lightweight fiberboard - not thin, per se - but definitely not OSB or anything like that. I meant to take some photographs last night but several diapers were placed in that trash receptacle, and I deemed it not worthwhile.
As for the countersink bit, some of us need more help that others. I should note that I'm referring to a drywall countersink bit, not a woodworking countersink bit. I think that the drywall countersink bit is one of the greatest simple tools ever. Just screw the screw in until it stops. Beautiful. Without it, I average about one proper countersink in eight. They either go far too far into the drywall or hang out, just above the surface.
oh, yes, drywall countersink bit == gooooood! Maybe I should put one on my Christmas list, as my success ratio is only slightly better than yours ;)
Mary Beth, you really must get one. They're cheap, and even my dad can get a good dimple most of the time with them.
It's a beautiful design, really. Just plow the screw in until it stops you. So long as you don't lean on it so hard that you damage the drywall with the outer ring, you're good.
Post a Comment