Thursday, January 14, 2010

Another month, another entry

slab wood 2010

I know it's been forever since I've posted anything here. It might have to do with my utter lack of progress on the house and my lack of desire to work in the cold weather.

It's cold. It's really cold. Did I mention that it's cold? We just used up the last of our firewood from last winter. We've been having fires quite frequently. The fireplace warms up the room quickly.

I ordered three bundles of slabwood, mostly cherry and hickory. This batch, unlike last winter, was debarked, so it should burn better and leave less creosote on the chimney.

slab wood delivery

Now, I just have to cut it up and avoid saving too much of it for craft/woodworking projects.

Photographs courtesy of the always lovely A.

Monday, December 7, 2009

A finished roof and an update, finally

Copper roof repair, finished!

I haven't posted here in a while because there hasn't been much going on around the house. The roof repairs are done for this year. I'm really pleased with the job that Dennis Crookshanks did on the job. There was a large section of slate that showed evidence of several different repairs in the past. He replaced it with flat-seam copper and installed ice guards. He also replaced some of the slate on the breezeway and replaced the flashing there, too.

Copper Roof, finished!

The flat-seam copper really looks great.

Of course, now I'm seeing all the other flashing work that needs to be done - one project at a time, I guess. Given the build quality of the rest of the house, I'm surprised that they used galvanized flashing instead of copper.


There's another reason why I haven't posted on here in a while. I've been working on another project, Cleveland Area History. I've been writing about all sorts of things relating to the history of the greater Cleveland area. I toured the house where Langston Hughes lived during his sophomore and junior years of high school. I've talked about two of the oldest houses in the area, one in Cleveland Heights, the other in Cleveland. I've illustrated a National Register of Historic Places historic district. And there's more. Check it out.

Monday, November 9, 2009

Roof progress!

New copper roof section

I had assumed that Dennis Crookshanks wouldn't be able to start work on the roof until spring. Much to my surprise, I got an email last week saying that he would beginning shortly. He began replacing the slate in the trouble area with flat-seam copper, which should hold up better than the slate.

New copper roof section

The copper, it looks so pretty.

Monday, November 2, 2009

My new blog - Cleveland Area History

I'd like to introduce you to a new blog that I'm working on, Cleveland Area History. It is an opinionated, sometimes snarky, usually rabidly preservationist look at the history of the greater Cleveland area. This will be a group effort - there is far too much to be addressed for me to tackle it alone.

Hopefully this will also serve to move some of the content that is less house-related away from this blog

Thursday, October 22, 2009

Tiny attic windows of DOOM!

Dormer

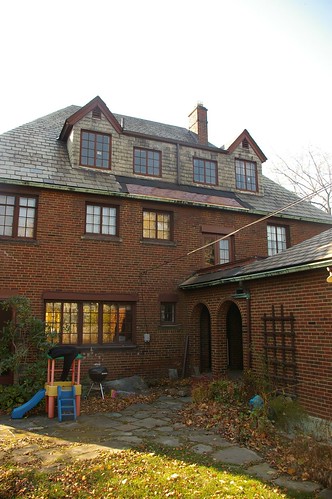
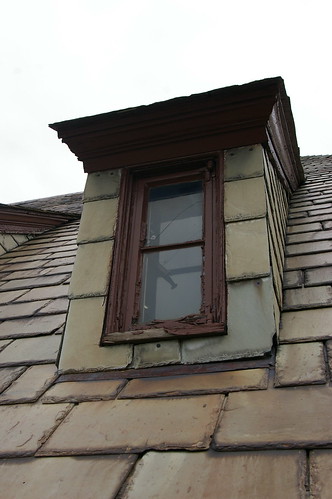
One of the last city point-of-sale violations that we have to address is replacing the broken glass in this window. It's a tiny dormer window on the third floor, on the front of the house. Actually, we have to replace the broken glass in two of these windows, as the city didn't note which one (perhaps one has broken since they recorded the violation) and I know that when the inspector shows up, he's just going to see the broken one.

Our house!

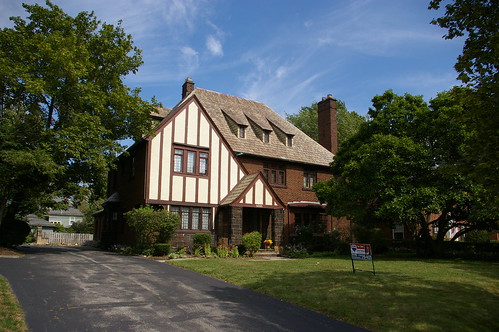
The windows don't look so bad - just another couple to reglaze - until you realize how high up they are. One option, working on them from the inside, was out of the question because of the lack of space to work and the relatively small window opening - the glass is just 8.5 inches wide. Once you take into account the framing of the dormer, it doesn't leave much space to work.

Front of the house

I considered renting or buying a large extension ladder. The ladder I have right now reaches comfortably to the edge of the roof, but not much higher than that. The positioning of such a ladder concerned me. I realized that the angle the ladder would have to be at to get to the window would be such that it would be difficult to properly secure it.

If I wanted to use ladders to get to this window, the best option seems to be to have one ladder to get up to the roof and then a second one resting on the roof, held in place with a couple ladder hooks over the ridge. I don't think that I'd be comfortable working up on the roof like that - while I'm ok with using the ladders, once I'm up high on them and things start moving, I get nervous. I worry that the movement of my tools will jostle the ladder and cause it to fall.

I talked to the guys at the local rental place, Handy Rents about renting a lift. The cheapest one that they had would be $170 a day. Once I heard the price, I suddenly felt a lot more willing to spend quite a bit of time in a small, cramped, space, trying to chisel away at the glass from the inside.

I'm finally almost finished removing the glazing from the first of these two windows. Rather than describe the process I went through, I'll instead describe how I plan to do the next window, based upon what I've learned so far.

First, I'll do my best to try to use the torch to soften up the glazing. This will be a challenge and will likely be only partially successful at best, as I won't be able to see exactly where I'm trying to hit with the torch from the inside. It should help some of the glazing to come out when I break up the glass. Then, I'd tape the glass, on the outside and the inside, with packing tape, because it's hard to catch every single little bit and the fragments tend to bounce down the roof. I'll hold a box lid from a file box underneath it and break out the window with a hammer. Once the glass in thoroughly broken, I'll remove it, to the best of my ability.

Next, the fragments of glass that are left will be taken out with a hammer. At this point, with the access that I now have through the space where the glass used to be, I'll use the torch again, to do a more complete job of heating up the old glazing. Then I'll chisel under the glass, trying to get the pieces out. Part of the trick here is to realize that you don't have to see what you are doing. One can, very carefully, work by feel instead. I'll take a methodical approach, chiseling the glazing out, to the best of my ability to feel it.

This won't get absolutely all the old glazing out. It's near impossible, given the work angles involved, to apply sufficient leverage to do so. I'm ok with this - hopefully the glass will stay in place.

Finally, I'll lay a new bed of glazing for the glass to sit in, install the glass, and then begin to glaze the window, reaching around the frame. The work won't be as clean as I would like, but it's high enough up that it won't be seen.

Leather work gloves are a necessity for this project. A very short chisel would be quite useful, given the cramped workspace.

Tuesday, October 6, 2009

Midtown Roofing Supply - purveyor of copper goods for roof repair

Midtown Roofing Supply, at 2695 E 55th St, Cleveland, OH, 44104, (216-431-4545), is an unassuming brick building that you'd probably miss if you weren't looking for it. There are no windows and it only has parking for two or three cars. I certainly wouldn't have stopped there if not for the recommendation by the people at Sutton Industrial Hardware.

Midtown Roofing seems to be the best place in Cleveland to buy the various supplies and tools that one might need to work on a slate roof. This includes slate hooks, in both copper and stainless steel, copper for flashing and valleys, as well as the various tools, like slate hammers and slate rippers that are needed to work with slate.

They might have quite a bit more, too - I'm not sure - most of the stock was back in their storeroom, not out on display.

Re-glazing Steel Casement Windows

I've replaced the glass in enough wood windows that I feel reasonably competent with it. The old glazing usually comes out easily, because a little bit of humidity always manages to get into the wood. The putty never looks quite as clean as I would like, but it does the job.

Steel casement windows are a different matter. The existing glazing tends to be rock solid and impossible to remove. It was so difficult that I resorted to removing one of the windows and taking it down to my workshop to chisel away at. This took forever and resulted in many small glass chips.

Finally, someone told me to use a torch to heat up the glazing. The heat softens the putty and makes it quite easy to remove. Unless great care is used, the difference in temperature will crack the glass, but since the glass is usually already broken, that shouldn't be an issue.

With a torch, I was able to replace one of the panes from up on the ladder, without having to fear for my life. It is a worthwhile expense, especially given the number of panes that I will eventually have to replace. The fancy new torches with electronic ignitions are quite nice, too.